Glitter Almond Christmas Nails: Dazzling Holiday Elegance
Glitter almond Christmas nails are the perfect way to add dazzling elegance to your holiday look. This almond shape is not only stylish but also flattering for all finger types. Start with a quality base coat to protect your natural nails, then choose festive colors like deep reds or sparkly greens. You can create fun designs with chunky glitter or classic holiday motifs like snowflakes. Remember to finish with a glossy top coat for extra shine. By keeping your nails clean and well-moisturized, you can ensure your holiday manicure lasts. There’s much more to explore about achieving stunning holiday nails!
Understanding Almond Nail Shape
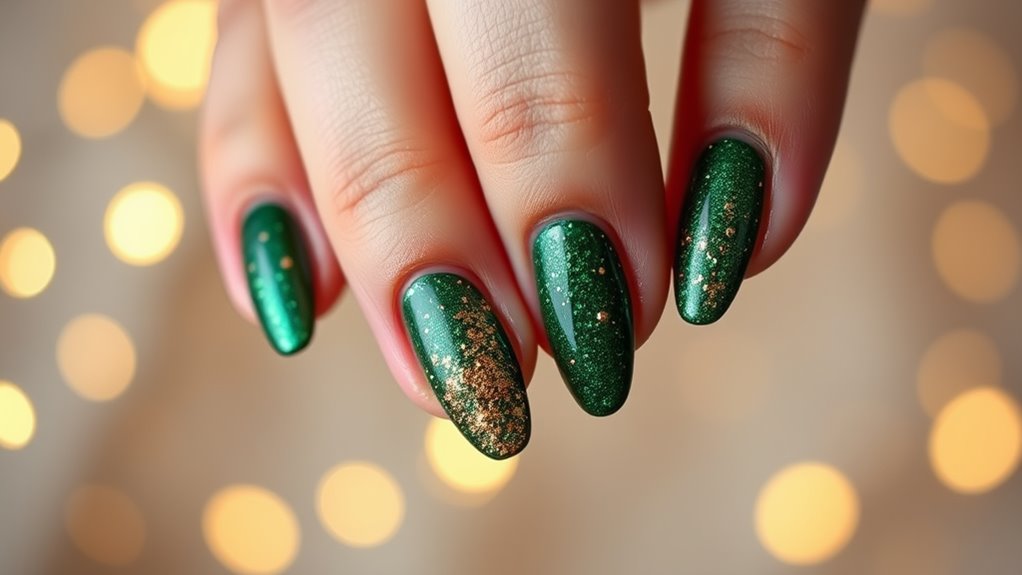
When it comes to nail shapes, almond nails are a popular choice for those wanting elegance and versatility. These nails mimic the shape of an almond, being tapered at the tip and slightly wider at the base. This design not only flatters various finger shapes but also offers a chic look that suits any occasion.
You’ll love how almond nails can make your hands appear longer and more slender, enhancing your overall style.
To achieve the almond shape, you’ll need to file your nails with a gentle curve. Start at the sides, gradually bringing the tip to a point. This technique creates a soft, rounded silhouette that’s less harsh than stiletto nails but still stylish.
Keep in mind that almond nails can vary in length, so you can choose what feels comfortable for you.
Another bonus is that these nails can easily complement different nail art designs. Whether you’re going for a classic color or a fun glitter look for the holidays, almond nails provide the perfect canvas.
Essential Glitter Nail Supplies

To create stunning glitter almond Christmas nails, you’ll need the right supplies to achieve that festive sparkle. Start with a good quality base coat. This will protect your natural nails and help the polish adhere better.
Next, pick your favorite nail polish colors. Classic reds, greens, and whites work beautifully for the holiday season.
Now, let’s talk glitter! Choose a fine glitter for a soft shimmer or chunky glitter for a bold look. You can find these in craft stores or beauty supply shops.
Don’t forget a top coat! A glossy top coat seals your design and adds extra shine, ensuring your nails look fabulous for days.
You’ll also need some nail tools like a nail file, cuticle pusher, and a good pair of scissors for any glitter cleanup. A makeup sponge can help you apply glitter evenly, so consider grabbing one too.
Finally, keep some cotton balls and nail polish remover handy for any mistakes. With these essential supplies in hand, you’re ready to dive into the dazzling world of glitter almond Christmas nails!
Happy decorating, and get ready to show off your festive flair!
Festive Design Ideas

There are countless festive design ideas that can elevate your glitter almond Christmas nails to the next level. You might consider a classic red and green color scheme, which captures the spirit of the season beautifully. Imagine a deep red base adorned with sparkling gold glitter at the tips, creating a stunning ombre effect.
If you want something a bit more playful, try adding snowflakes or tiny Christmas trees on a nude background. You can use white polish to paint these designs, and a touch of silver glitter can give it that extra sparkle.
For a modern twist, how about a marbled effect using shades of emerald green and icy blue? This design isn’t only eye-catching but also unique, perfect for holiday parties.
Don’t forget about festive accents! Adding rhinestones or small gems can create a luxurious finish. You can place these around the cuticles or strategically along the nail for extra bling.
Lastly, consider using metallic nail tape to add clean lines and geometric shapes, making your nails look chic and sophisticated. With these ideas, you’ll surely have nails that are the highlight of any holiday gathering!
Step-by-Step Application Guide

Begin by prepping your nails for the perfect glitter almond Christmas look. Start by removing any old polish with a gentle nail polish remover.
Next, trim and file your nails into that lovely almond shape. Don’t forget to push back your cuticles gently to create a clean canvas.
Now it’s time to apply a base coat; this helps the polish adhere better and protects your nails.
Once the base coat’s dry, pick a festive nail color, like a deep red or shiny green. Apply two coats for a vibrant finish, letting each coat dry thoroughly.
Now, here comes the fun part! Grab your glitter polish and apply it to the tips of your nails for a dazzling ombré effect. For an extra touch of elegance, you can sprinkle some loose glitter on top while the polish is still wet.
After everything’s dry, seal your masterpiece with a top coat to add shine and protect your design.
Voila! You’ve created stunning glitter almond Christmas nails that are sure to impress. Remember to take your time and enjoy the process, as beautiful nails are all about creativity and care.
Happy decorating!
Tips for Long-Lasting Nails

For the best results and to keep your glitter almond Christmas nails looking fresh, follow a few essential tips. First, always start with clean, dry nails. This helps your polish adhere better and last longer.
Next, apply a base coat; it protects your nails from stains and provides a smooth surface. When applying your glitter polish, use thin layers. This allows for even drying and minimizes chipping. After your glitter layer, seal it with a top coat. This not only adds shine but also protects your design from wear and tear.
Additionally, avoid using your nails as tools. Opening cans or scratching surfaces can lead to chips and breaks. If you notice any chips, fix them right away. Touching up small areas can extend the life of your manicure.
Lastly, keep your nails moisturized. Use cuticle oil regularly to prevent dryness and breakage.

